ascort
  • ascort
  • pre67vw Junkie Topic Starter
12 years ago
The restoration of the Ascort can be a mixture of easy and hard.

Many parts used in the cars were common parts taken from VW, Porsche and some other makes, which means just searching for the bits.

Other things are things are much more difficult as they were unique to the cars. One example of this is the emblems for the cars. It would seem that not all cars had emblems when they were built new and very few emblems now remain. (Only a few rears and maybe one front - which I have not been able to access)

Once the paint was removed from my car the filled holes could easily be seen,showing that my car had a full set of emblems when first built. It would seem that these were removed early in the car's life as the first repaint was done in its first year of life and this covered the emblem holes. I just had to have emblems for my car but as none were available it meant creating my own.

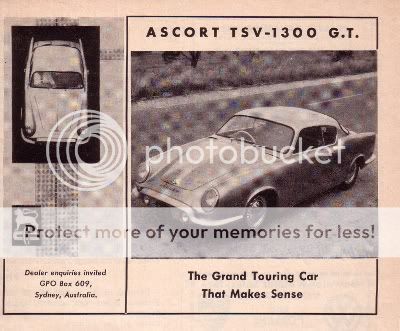
This is what was required for the front. The logo on the advertisement was also used as a guide.
UserPostedImageUserPostedImage

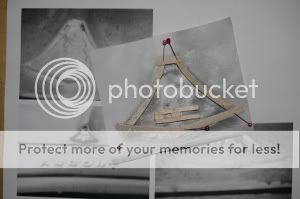
I enlarged every old photo that I could find that showed the front emblem and then played with the size until I could get the profile of the front emblem to cover the original mounting holes in a position on the emblem where it would be logical to have the mounting screws.

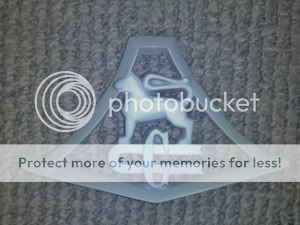
A balsa wood version of the emblem was created on the photo enlargement, with the advertisement logo used to help with fine detail.
UserPostedImageUserPostedImage

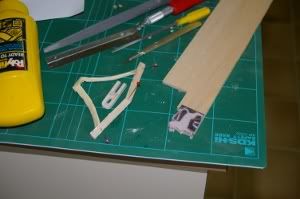
Once the rough balsa version was made a trial fit was done.
UserPostedImageUserPostedImage

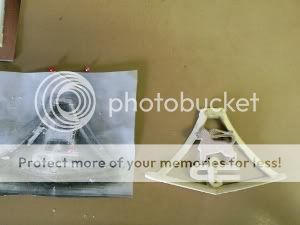
After some sealing and shaping with the poly filler and automotive paint putty, I took a silicone mould of the emblem and created a resin version. This was further worked and corrected and then another silicone mould was taken. Resin versions containing aluminium powder then were created.
UserPostedImage

Mounting screws were bonded in and this version of the emblem has now been sent off for chrome plating. I also intend to send another emblem off to get a price on having it cast in metal, but I suspect that this may be excessive.
Mark - Owner of 2 under restoration Australian coachbuilt Ascorts.
Sponsor
Log-in to remove these ads
ascort
  • ascort
  • pre67vw Junkie Topic Starter
12 years ago
The next exercise was the front letters. The font does not match anything that I have found ... so it is make my own again.

I managed to borrow a set of letters from the family of the designer (Mirek Craney) and I was able to take a cast of them to record the shape. I considered having them cast, but instead have opted to draw them in CAD, then use water jet cutting to cut blanks out of stainless steel plate. It then takes about a day per letter to hand finish with the files, dremel, sandpaper and metal polish.

UserPostedImage

At the time that this photo was taken the "A" and "C" were done and the "S" was just started (a slow process with needle files due to the narrow gap).

I am now finished the "S" and "O" almost finished the "R" with just the "T" and the mounting pins left to do.
Mark - Owner of 2 under restoration Australian coachbuilt Ascorts.
ascort
  • ascort
  • pre67vw Junkie Topic Starter
12 years ago
The rear emblem was easier in that I was able to photograph the emblem off one of the southern cars and was also able to borrow an unfinished (flawed) casting from the Craney family.

The original emblem was sand cast brass that was hand finished and chrome plated. (Some cars appear to have had polished brass).

UserPostedImage

I opted to use a photograph which was then traced in a CAD package. The resulting .dxf file was then used as the pattern for having blanks cut from 5mm stainless steel plate by a water jet process.

One of these was then hand finished and curved to match the rear boot lid.
UserPostedImageUserPostedImage

Once I was happy with the shape, the emblem was matched to the original holes in the car and mounting screws were added to the emblem.
UserPostedImage

It is interesting to note how much higher the emblem on my car sits (using original mounting holes) than the car in the top photo. I guess this is common to most coachbuilts. This variation between cars seems to be in nearly every aspect when you look closely at the cars.

Once the emblems are finished it is back to scratch building window regulators (again using CAD and water jet cutting of the quadrants). It would be so much easier if I could find out what the orinal units were.
Mark - Owner of 2 under restoration Australian coachbuilt Ascorts.
ascort
  • ascort
  • pre67vw Junkie Topic Starter
12 years ago
The front emblem is now back from the chrome plating.

It is only a self taught homemade effort, but I am happy with the results.

It now feels worth the effort. :smile:

UserPostedImage
Mark - Owner of 2 under restoration Australian coachbuilt Ascorts.
pbaptist
12 years ago
It looks very good.

Congratulations. All you effort turned out very nice.

Regards
Patrick

ascort
  • ascort
  • pre67vw Junkie Topic Starter
12 years ago

It looks very good.

Congratulations. All you effort turned out very nice.

Regards
Patrick

pbaptist wrote:


Thanks for that Patrick. It has been a long slow process but I am fairly happy with the end result.

It is also good to know that if my emblem gets stolen or damaged that I have the moulds and can make another.

I will still send one of my spare resin castings off to an get a price for it to be reproduced in stainless steel using a lost wax process. No doubt that would be an expensive exercise but some of the other owners may like emblems as well and the more made the cheaper they should become.

The exercise has been a great leaning exercise on how to make patterns and moulds. The process of designing parts using CAD and then having them cut from materials such as stainless steel has also opened up lots of other possibilities.
Mark - Owner of 2 under restoration Australian coachbuilt Ascorts.
pre67vw
12 years ago
Nice work!
Rob Amos
Happiness is a stock VW