pre67vw
12 years ago

No not realy but who knows whats gone on in there if it was me i would look around for a nother axle. just for pice of mind. Thay may have cut and removed some of the laminate springs so she would sit lower but with out taking it to bits !!

Andy W

AW wrote:


I doubt it, you have to remove sections on the outside section from the grub bolts otherwise it doesn't lower (don't ask how I know :rofl:) Might just be that they wanted to lower it, cut through half way and then chickened out. It's easy enough to take the trailing arms off one side, pull the leaf springs out and check that they're all OK.
Rob Amos
Happiness is a stock VW
AW
  • AW
  • pre67vw Junkie
12 years ago
Yes You have to leave an inch of leaf for the grub screws to hold and remove the rest it gives you a weeker spring.


Andy W
THEBOFFIN
12 years ago

No not realy but who knows whats gone on in there if it was me i would look around for a nother axle. just for pice of mind. Thay may have cut and removed some of the laminate springs so she would sit lower but with out taking it to bits !!


Andy W

AW wrote:


Mind you the one from my 1962 pan is perfect, just set up for RHD...easy mod though!

...looking at the rear spring plates again though, and judging by the rust and no obvious sign of the spring plates being removed from the torsion bars on the rear axle, i suspect they may have been taken out together and just pushed back into place??...ssupose the only way to tell is tap the plates out with a hammer and see wether they spring down!:omg: ??
AW
  • AW
  • pre67vw Junkie
12 years ago
The fun of old cars :rofl:


Andy W
THEBOFFIN
12 years ago

The fun of old cars :rofl:


Andy W

AW wrote:


Indeed!..we must all be crazy!!:drool:
THEBOFFIN
11 years ago
Hi All

Just a few pics on the pan swap...62 to 56!

Once the birds nest in the frame head had been removed (even found an old egg!)...the 56 pan needed a lot more patching than i'd envisaged in ...mind you i had been outside for 20 years under semi cover!...then a couple of fresh coats of smoothrite and it looked good!.....
UserPostedImage
UserPostedImage
UserPostedImage
UserPostedImage

then with the aid of my dad a two person shell lift..balancing on the tyres on the way!..
:shock: 😃
UserPostedImage
UserPostedImage
UserPostedImage
UserPostedImage
UserPostedImage

62 pan now ready for its new owner..

UserPostedImage
THEBOFFIN
11 years ago
Just need to work out how to set up the rear spring plates now to factory ride height, then i can get the 56 box bolted to the pan....the previous pan owner had bodged a later rubber donut and put it behind the spring plate in the torsion tube!...either to take up slack??..or more likely to make the car wider and lower at the rear!!!..pushed plate out by 10mm! never seen anything like it before!!

are there any special tools needed to set up the angle of the plate?, or just a protractor??
Andy Sparks
11 years ago
i done mine with a bit of maths and a large bit of cardboard. more accurate.
You can never have too many accessories on your car. 🙂
THEBOFFIN
11 years ago

i done mine with a bit of maths and a large bit of cardboard. more accurate.

Andy Sparks wrote:


can you tell me the dimensions and angle etc to set mine up?

thanks
THEBOFFIN
10 years ago

can you tell me the dimensions and angle etc to set mine up?

thanks

THEBOFFIN wrote:


Hi
Can anyone help?:shock: , putting my pan back together this week and need to know, havent even go a haynes manual anymore that i think has the angles?

cheers
:d
THEBOFFIN
10 years ago
Hi all

after a long break ive now re-arranged my garage and flipped the old girl on her side to get the welding done....after the shotblasting a couple of years back the body has held up well..see nex few pics of areas i need to tackle...both rear ends of the sills need some work as can be seen, but i dont want to remove and replace them as they are 80% solid, i think a rust treatment on the inner heater tubes and repair plate over the bottom as i've no intention of using the heating system. 😃 😃 :shock: :shock: 😃 😃

UserPostedImage 
UserPostedImage 
UserPostedImage 
UserPostedImage 
UserPostedImage 
UserPostedImage 
UserPostedImage 
UserPostedImage 
UserPostedImage 
UserPostedImage 
UserPostedImage 
UserPostedImage 
UserPostedImage 
UserPostedImage 
UserPostedImage 
UserPostedImage 
UserPostedImage 
UserPostedImage 
UserPostedImage 
UserPostedImage 
UserPostedImage 
UserPostedImage 
UserPostedImage 
UserPostedImage 
UserPostedImage 
UserPostedImage 
UserPostedImage  😃 😃 😃 😃 😃
Chris
10 years ago
You've certainly got your work cut out for you with the shell. However, I'm sure it will all be worth it once it's done and in paint :thumbup:
A day may come when the courage of men fails, when we forsake our friends and break all bonds of fellowship, but it is not this day.
THEBOFFIN
10 years ago
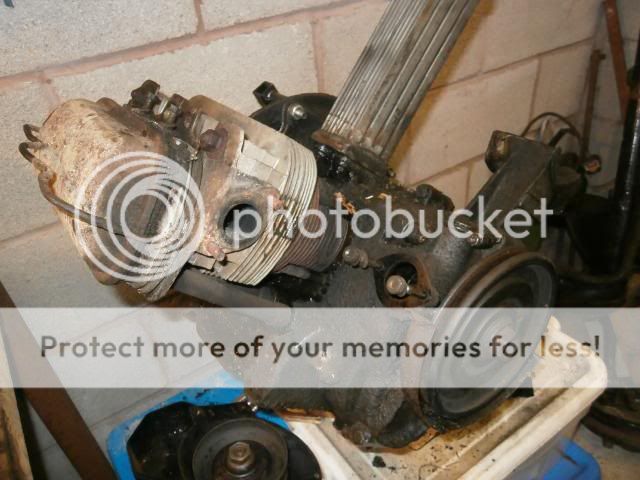
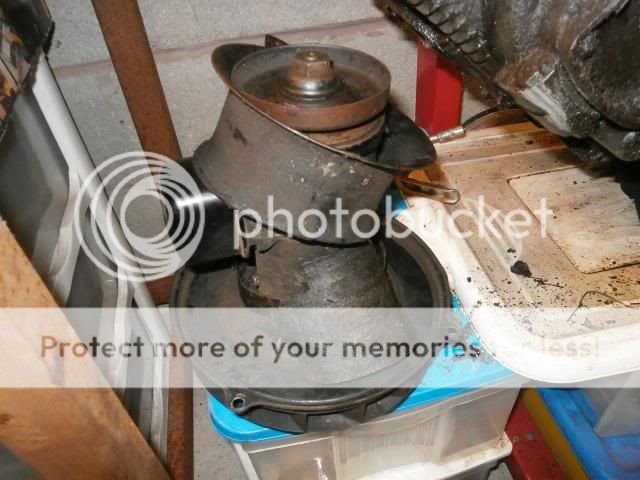
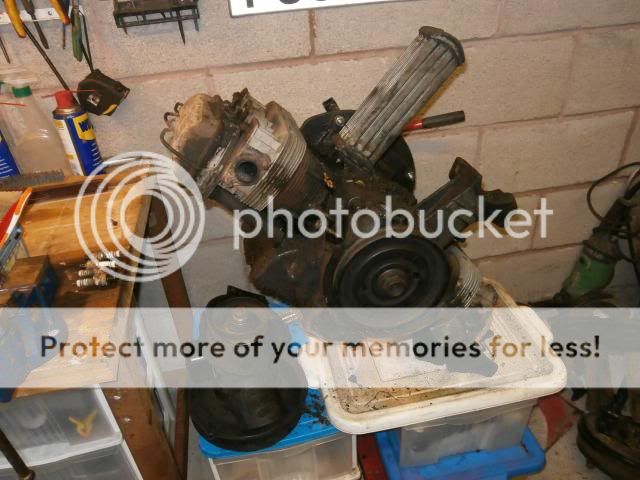
My Dad started to strip the 56 engine today, never saw it running but seems in reasonable condition, but won't know until we get the heads off.

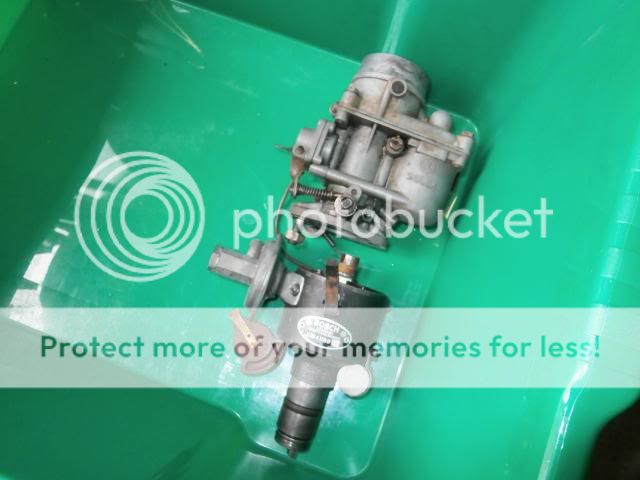
Manual choke 28 PIC carb is missing a stud and the idle jet, theres a sheared rocker retainer clip, some missing screws on tinware, but engine doesn't look like its been apart, just covered in grease!

teeth on flywheel are chewed so will need the correct 6V flywheel if anyone has one?

Plan is just to thoroughly clean check and re-gasket plus sevice parts as neccessary depending on wear as the engine doesn't seem have too much endfloat.
Then repaint and fit :shock: :D

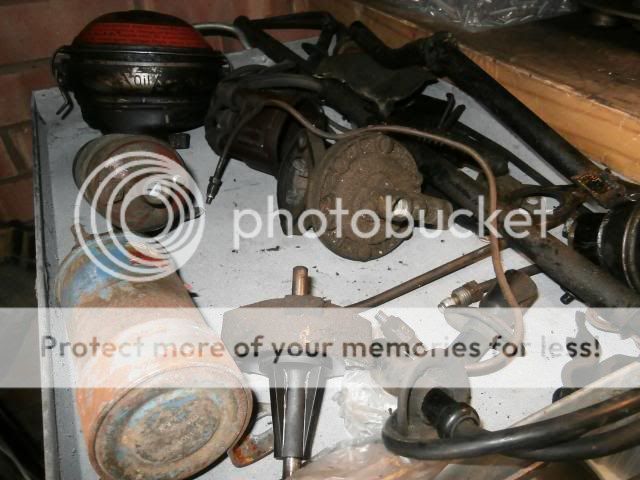
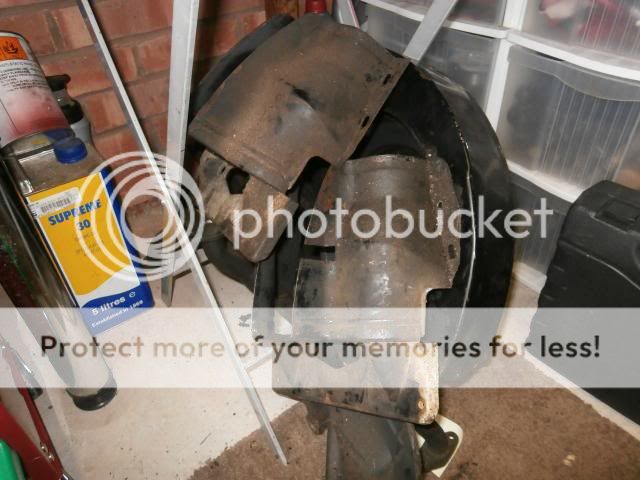
here are a few pics...
UserPostedImage 
UserPostedImage 
UserPostedImage 
UserPostedImage 
UserPostedImage 
UserPostedImage 
UserPostedImage 
UserPostedImage 
zelensis61
10 years ago
Nice picts. Just one tought from my side.
If the car was mine, I whould replace the reinforcement rails. They are heavy metal rails with on the inside a V shaped profile ( v with a flat bottom. They are needed to avoid that once you step in to the car, the doors whould shut and open normaly. I had checked an early convertible for a friend a few months ago. With pict album from the resto.... Guess what, they did not use the original reinforcement rails but aftermarket...when I pointed them to this issue, they told me...they are ok. Then we steped in to the car with 2 adults (95 kg each) and the doors jammed terrible. The Z plate inside the heater channel and the V profile was not copied in the aftermarked rails.
I am sure you can weld them up but will they be ok? and what about warping due to welding.
My 1303( sorry rob:omg: ) was once welded on one side.Well done but due to the tension...The doorgap is not ok now. I know it is hard work but then you can be sure that all the work is ok. Just my idea. :thumbup:
ZELENSIS, coachbuilt body from the 50's on a vw platform made in Belgium. Peter the heb detective
THEBOFFIN
10 years ago

Nice picts. Just one tought from my side.
If the car was mine, I whould replace the reinforcement rails. They are heavy metal rails with on the inside a V shaped profile ( v with a flat bottom. They are needed to avoid that once you step in to the car, the doors whould shut and open normaly. I had checked an early convertible for a friend a few months ago. With pict album from the resto.... Guess what, they did not use the original reinforcement rails but aftermarket...when I pointed them to this issue, they told me...they are ok. Then we steped in to the car with 2 adults (95 kg each) and the doors jammed terrible. The Z plate inside the heater channel and the V profile was not copied in the aftermarked rails.
I am sure you can weld them up but will they be ok? and what about warping due to welding.
My 1303( sorry rob:omg: ) was once welded on one side.Well done but due to the tension...The doorgap is not ok now. I know it is hard work but then you can be sure that all the work is ok. Just my idea. :thumbup:

zelensis61 wrote:


Hi

Thanks, for the advice, just found a chap on The Samba in the USA selling replacement rails exactly the same as an original ones, as he used an NOS one as a pattern.
on the photos you can clearly see the flat 'V' shape reinforcement inside.

https://www.thesamba.com/vw/classifieds/detail.php?id=1089247 

I will have a closer look at mine and see how much of the 'V' is left then see wether i can perhaps use a box section of steel inside the 'V' to strengthen the rusted section of the rails, while the doors are fitted to keep the gaps true.:d
THEBOFFIN
10 years ago
Hi all
almost completed stripping down engine but can't find a 15mm socket wth a shallow enough shoulder to get in to remove head bolts!
can anyone help or point me in the right direction to get a tool?
thanks!

UserPostedImage 
UserPostedImage 
Rich Oakley
10 years ago

Hi all
almost completed stripping down engine but can't find a 15mm socket wth a shallow enough shoulder to get in to remove head bolts!
can anyone help or point me in the right direction to get a tool?
thanks!

UserPostedImage 
UserPostedImage 

THEBOFFIN wrote:


You need something like a Draper Expert CR-V 15mm socket. Go to a Draper supplier and they'll have one (Car spares shop, tool supplier etc). This socket has a much narrower diameter.
47 Beetle, 56 UK Karmann Cabriolet, 56 UK Beetle, 57 UK Type 2, 59 UK Beetle, 66 UK Fastback.
THEBOFFIN
10 years ago
Thanks Rich

I'll get one of those, we can then get the heads off and see the condition of the rest of the engine.

On first inspection its not too bad, apart from the top of one of the valves has a chip off the end and one pushrod is very slightly bent with what appears to be a very slight kink at the rocker arm end, although they are very subtle and you really have to look to see them!
My Dad and I both think these faults have been there from the factory, and the engine does not appear to have ever been apart previously

cheers
adam
THEBOFFIN
10 years ago
Hi Rich

here's a pic of the chipped valve,

any thoughts on wether it was like this from factory?
UserPostedImage 
THEBOFFIN
10 years ago
More engine progress pics..

cleaning messy tinware! :shock: 😃 lovely job!..will then paint strip clean off rust, treat, prime and paint...should the finish be semi matt black or gloss black?..bit unsure!
engine almost stripped down to block. heads look ok, will give them a good clean and decoke, also barrels and pistons are good on the one side and after a decoke spotted the original VW stamp on the top of the pistons!
Other jobs to do ..rewelding steering box locating tabs from rusty LHD axle to solid 62 one, checking starters and dynamos etc.
Flying along now 😃 :lol: 😃 😎 really got the VW 'bug' back!!!
UserPostedImage 
UserPostedImage 
UserPostedImage 
UserPostedImage 
UserPostedImage 
UserPostedImage 
UserPostedImage 
UserPostedImage 
UserPostedImage 
UserPostedImage 
UserPostedImage 
UserPostedImage 
UserPostedImage 
UserPostedImage 
UserPostedImage 
UserPostedImage 
UserPostedImage 
UserPostedImage 
UserPostedImage 
UserPostedImage